Recently, I worked on a ASP.NET 4.6 MVC 5 project which didn’t have anything MVC about it. 🙂
It was a Single Page Application built on TypeScript, Knockout JS, CSS. Now, since it we didn’t have any server side code, we decided to give Gulp a try to concatenate and minify the JS and CSS files. Below I have explained the steps to configure gulp on ASP.NET 4.6 application with Visual Studio 2015. I created a sample application to explain the steps.
Install and set up Node.js
- Download and Install node.js v4.4.4 from here
- Once Node.js is installed, open Node.js Command Prompt
- Execute command: npm install –global gulp-cli – This command will install gulp globally.
- Optionally, execute command npm install -g npm3.This will install npm3 alongside npm.The reason I installed npm3 alongside npm was because npm3 installs the dependencies in flat file structure while npm v2 installs the dependencies in hierarchical structure. For windows machine this can be issue as full file path could exceed more than 255 characters.
Configure Gulp in Visual Studio
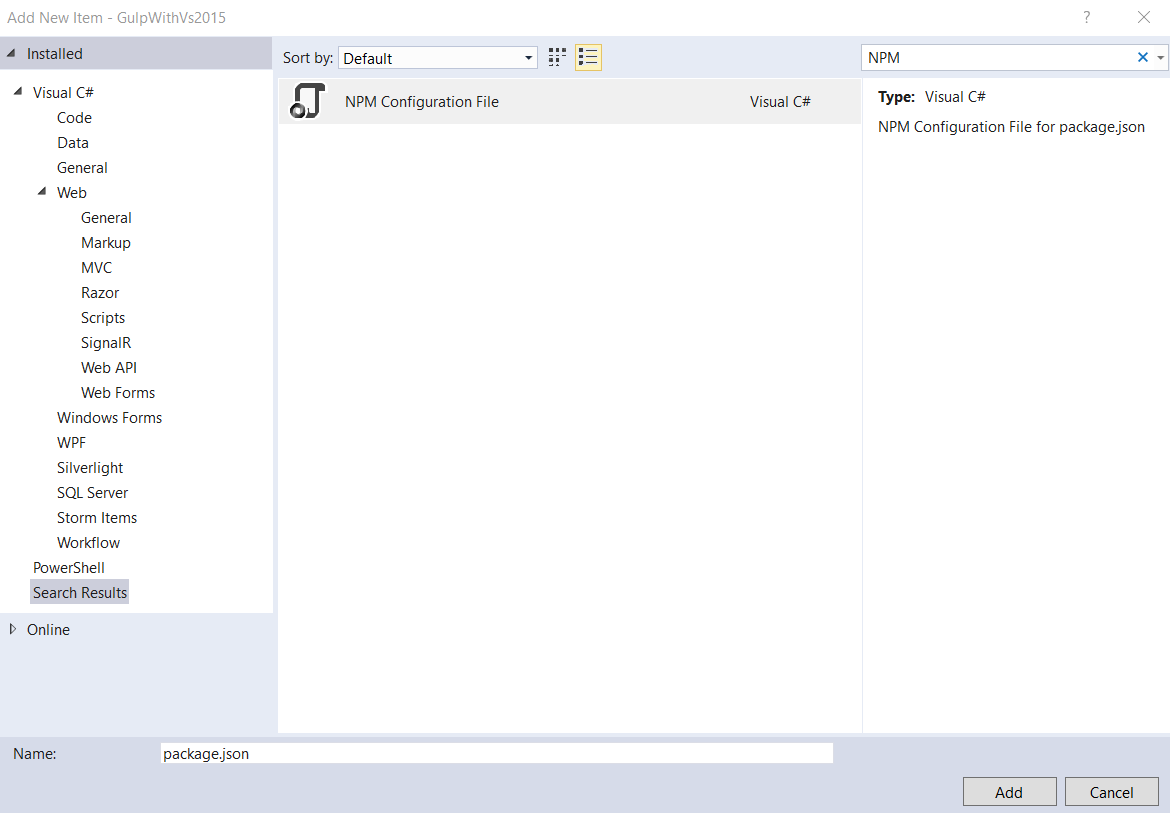
- Right click your Visual Studio project, and click new item. Search for NPM template. and select NPM Configuration File. This will add package.json file to your Visual Studio project.
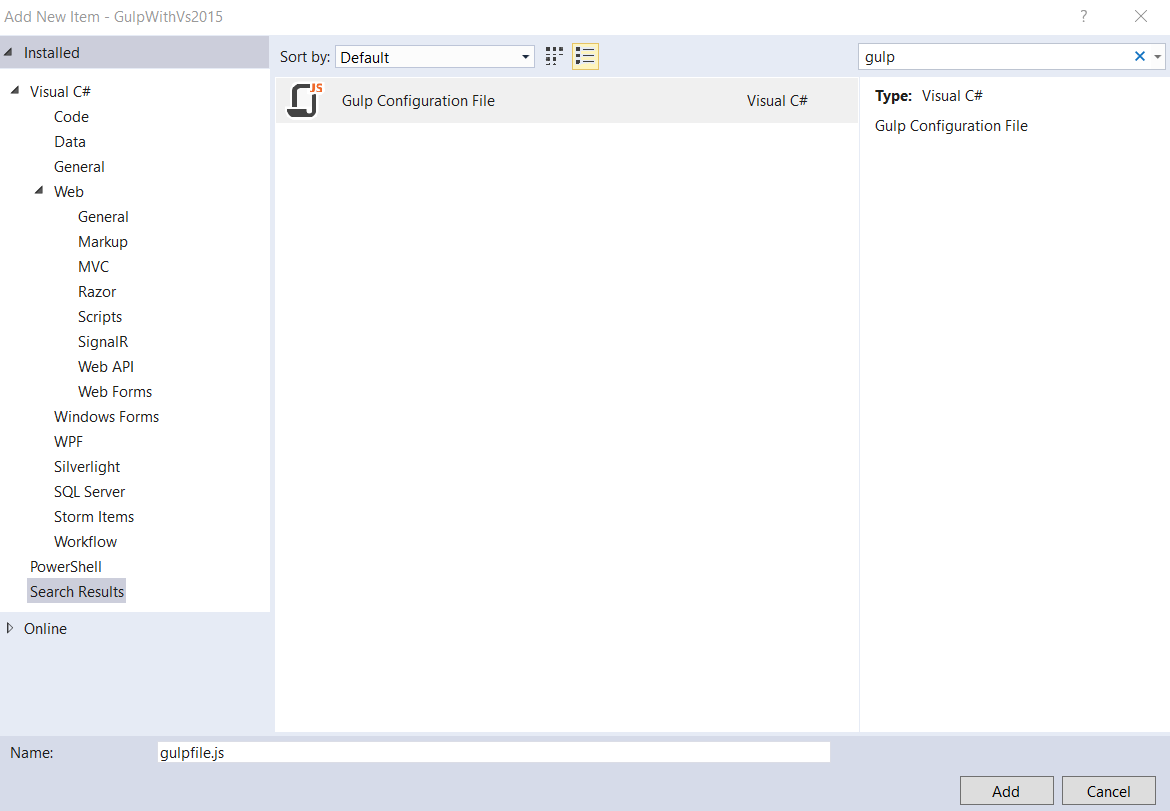
- Similarly, add Gulp Configuration File from installed template. This will add a file with name gulpfile.js to the Visual Studio Project. You will add your gulp tasks to concatenate and minify in this file.
- Now, add a JavaScript file with name gulp.config. This is a configuration file which will be later used by our gulpfile. It contains configuration settings like html source, js/css files source that needs to be minified, name of minified js file etc. A sample gulp.config file is shown below:
module.exports = function() { var config = { htmlSource: [ "index.html" /* The HTML file */ ], js: [ "./lib/js/Javascript1.js", "./lib/js/Javascript2.js" /* List of js files in the order as they appear in index.html*/ ], minJs: "js-min.js", /* Minified JS file name */ minJsDestination: "./lib/js/", /* Minified JS file destination */ css: [ "./lib/css/*.css" /* List of css files that need to be minified */ ], minCss: "css-min.css", /* Minified CSS file name */ minCssDestination: "./lib/css/" /* Minified CSS file destination */ } return config; } - Now, open your html file where the minified js and css files need to be injected. Remove the css files reference from html file and add below code to your html file.
<!-- inject:css -->
<!-- endinject -->
Similarly, remove the js files reference and add below code to your html.
<!-- inject:js --> <!-- endinject --> - Next, we need to install the Gulp packages to first concatenate, minify js/ css files and later inject the minified files to html. To achieve this following packages need to be installed through NPM:
- gulp – The streaming build system
- gulp-csso – Minifies CSS
- gulp-uglify – Minifies JS
- gulp-inject – Injects file references into html
- gulp-concat – Concatenates files
- Open, Node.js Command Prompt. Go to your project folder and execute the below command.
npm3 install --save-dev gulp gulp-csso gulp-uglify gulp-inject gulp-concatAs you can see we used npm3 to install gulp packages locally to install the dependencies in a flat structure. And instead of installing each package one by one we used a single command to install all the packages together.
- Once the packages are installed, go to package.json and you will see the installed packages under devDependencies. You will also notice a folder node_modules created under your project where all the packages are installed.
- Next, we will start writing gulp tasks in gulpfile.js. Go to gulpfile.js and add the required packages you need for your tasks.
var gulp = require("gulp"); var concat = require("gulp-concat"); var uglify = require("gulp-uglify"); var minify = require("gulp-csso"); var inject = require("gulp-inject"); var config = require("./gulp.config")(); - Now, add the gulp tasks to minify js and css files.
// Task to minify JS
gulp.task("min-all-js", function () {
    return gulp
        .src(config.js)
        .pipe(concat(config.minJs))
        .pipe(uglify())
        .pipe(gulp.dest(config.minJsDestination));
});
// Task to minify CSS
gulp.task("min-all-css", function () {
    return gulp
   .src(config.css)
   .pipe(concat(config.minCss))
   .pipe(minify())
   .pipe(gulp.dest(config.minCssDestination));
});
To verify the above tasks go to View-> Other Windows -> Task Runner Explorer. In the Task Runner Explorer window you will see the two tasks created by you. Run these tasks from the window and verify that it creates the minified files in destination folder.
- Now, add the gulp tasks to inject js and css files into html source
// Task to inject minifed JS gulp.task("inject-min-js", function () { return gulp .src(config.htmlSource) .pipe(inject(gulp.src(config.minJsDestination + config.minJs))) .pipe(gulp.dest(".")); }); // Task to inject minifed CSS gulp.task("inject-min-css", function () { return gulp .src(config.htmlSource) .pipe(inject(gulp.src(config.minCssDestination + config.minCss))) .pipe(gulp.dest(".")); }); - With this we have created all our required gulp tasks. Next step is to run these tasks at the time of build. Go to Task Runner Explorer, right click task min-all-css, select Bindings -> Before Build. This will tell Visual Studio to run this task before the build starts. Similarly, add tasks min-all-js, min-inject-css, min-inject-js. Make sure these tasks are added in correct order.
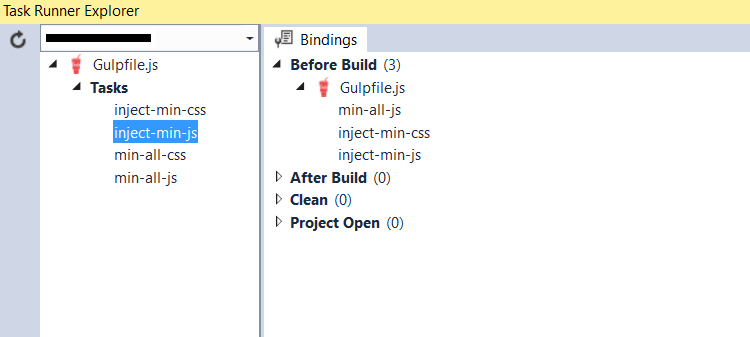
Gulp task binding - That’s it. Now, just build the application. And you will see the gulp tasks are run before the build starts. If you go to your html source file, you will see the minified css and js files are injected into your html file.
<!DOCTYPE html>
<html>
<head>
<title>Gulp Test</title>
<meta charset="utf-8" />
<!-- inject:css -->
<link rel="stylesheet" href="/lib/css/css-min.css">
<!-- endinject -->
</head>
<body>
    Gulp Test
</body>
</html>
<!-- inject:js -->
/lib/js/js-min.js
<!-- endinject -->

Leave a Reply