This post is two-part series where I will explain how we can publish a web app to Azure Virtual Machine.
In the Part 1 of this post I have explained how to publish a web app directly from Visual Studio. In the Part 2, I will publish the same web app from Visual Studio Team Services.
Important Note: Publishing a web app from Visual Studio directly should be use only during development. Usually, developers do not have access to Production VMs. In Production you can use PowerShell script to publish the web app outside the Visual Studio.
Prerequisites
- Active Azure Subscription. Create your free Azure account if you don’t already have one.
- Windows Virtual Machine on Azure: Follow these steps on to create an Azure Virtual Machine. For this demo I have created “Windows Server 2012 R2 Datacenter” with deployment mode as “Resource Manager“.
- Visual Studio 2015 – Update 2 with Azure SDK 2.9 or greater.
- Code repository on Visual Studio Team Services: Create an account on Visual Studio Team Services and set up your code repository using Git or Team Foundation Version Control. I have used TFS as my version control for this demo. This step is required only for part 2 of this series.
Configure Virtual Machine
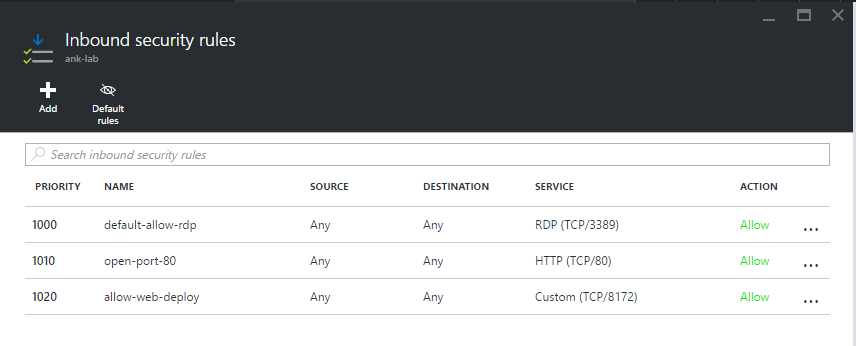
1. Open http port 80 and web deploy port 8172
Our first step is to open http port 80 and web deploy port 8172 on Azure VM. In the classic Azure VM this step is straightforward. All you need to do is to create an endpoint. While port 80 is opened by default, you can follow these steps to open endpoint 8172.
In the Azure Resource Manager (ARM) VM we need to open both ports 80 and 8172. You can follow my previous blog post where I have explained how add an Inbound security rule to open port 80 on the Azure VM. Similarly, you need add an Inbound security rule to open port 8172 on the VM.
Your Inbound security rules window on Azure portal after adding rules to open the port should like figure below:
2. Configure DNS Name
With classic Azure VM, the cloud service is created automatically and you do not need to do anything special to configure DNS name.
To configure DNS name with ARM VM, follow the steps to configure azure vm in my previous blog post.
3. Set up web deploy on remote machine
Now, remote desktop on your virtual machine and install IIS on your machine. To install IIS, go to Add Roles and features Wizard and select Web Service (IIS), under Application Development select all options.
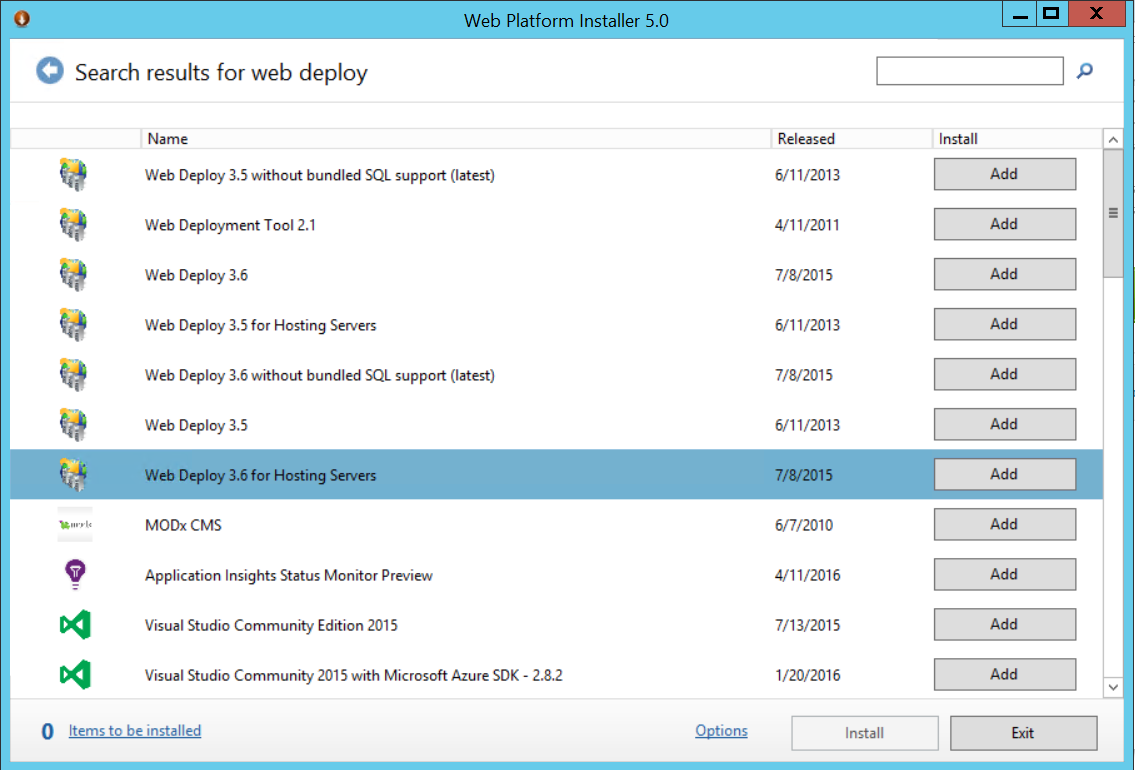
Now, install Web Platform Installer 5.0 on your server from this link. Once installed search for web deploy on the Web platform installer. Look for “Web Deploy 3.6 for Hosting Server” and install.
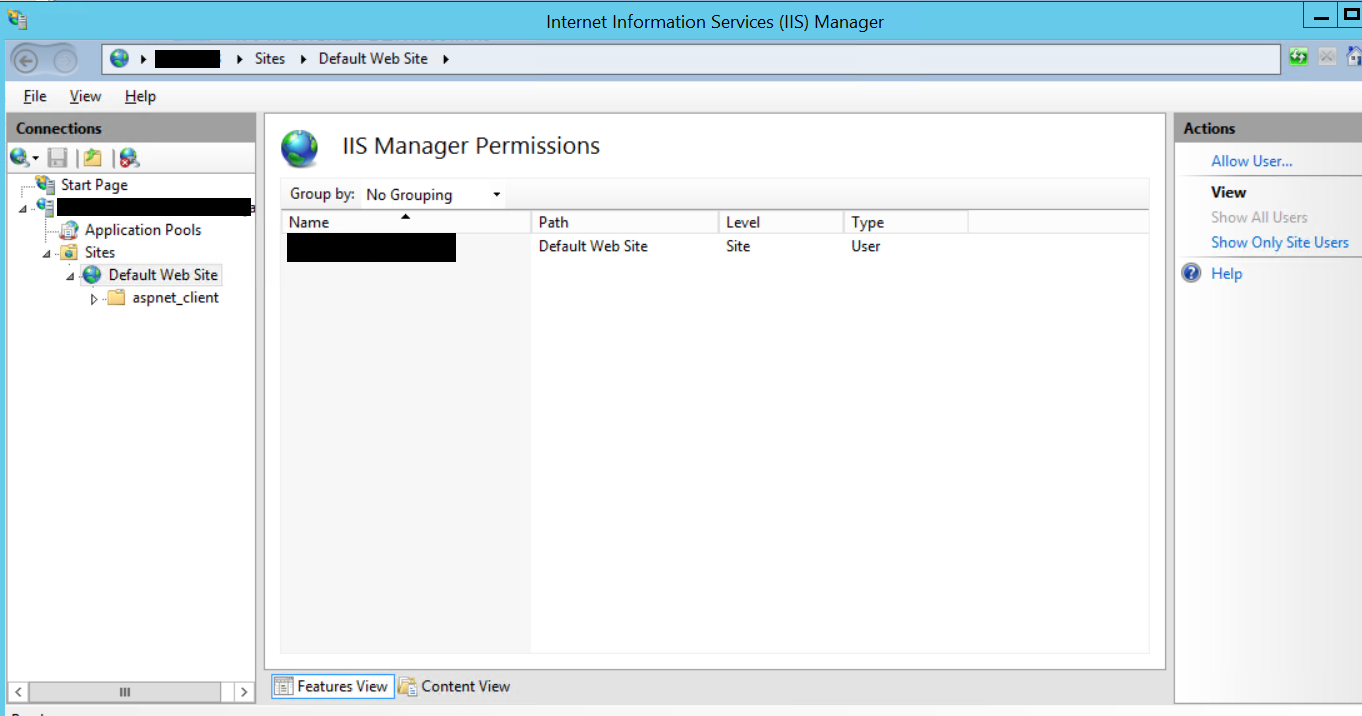
The next step is to create a website in IIS where we will host our application. To keep the things simple for this demo, I will deploy my application on Default Web Site. Now, select your website from IIS. Then, under IIS Manager Permissions add user with appropriate permission.
Before we proceed further make sure that you have opened port 8172 on Windows Firewall. For this you need to create following firewall rules on your machine:
| Direction | From Port | To Port | Port Type |
|---|---|---|---|
| Inbound | Any | 8172 | TCP |
| Outbound | 8172 | Any | TCP |
Publish Web App from Visual Studio
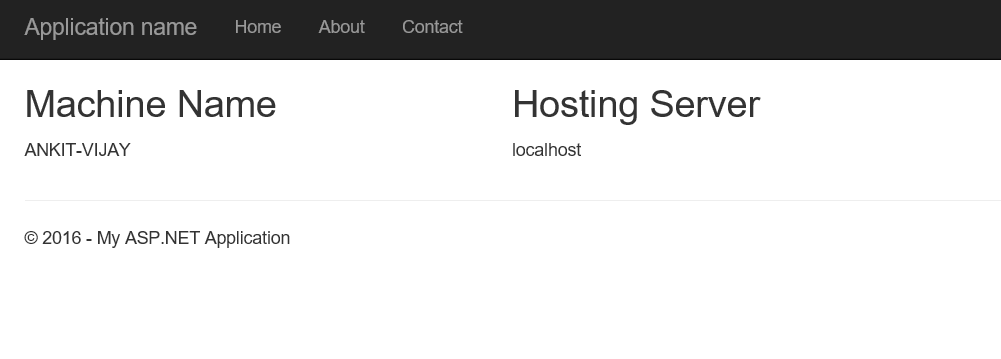
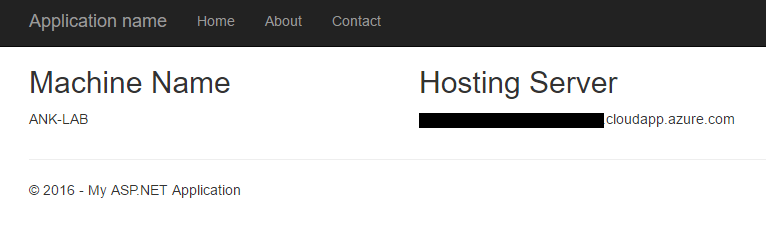
For this demo I have created a simple MVC web application from the standard visual studio template. I modified the home page to show my machine name and hosting server. On local, my homepage looks like below:
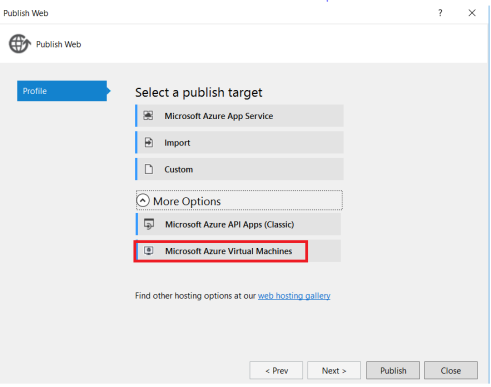
Now, the next step is to create a publishing profile to publish the web app directly from Visual Studio to Azure. Select the project, right click and select publish. On the publish window, expand More Options and select Microsoft Azure Virtual Machines.
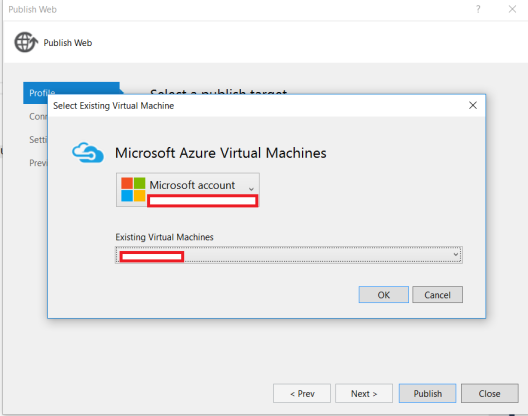
You will be then asked to login to the Microsoft Azure account. Login to your Azure account and then select the Windows VM you have created already.
Click Next and provide your publish details. Keep the publish method as “Web Deploy“. Do not change the server details. Provide the name of the site you created in previous steps. Provide your VM username and password.
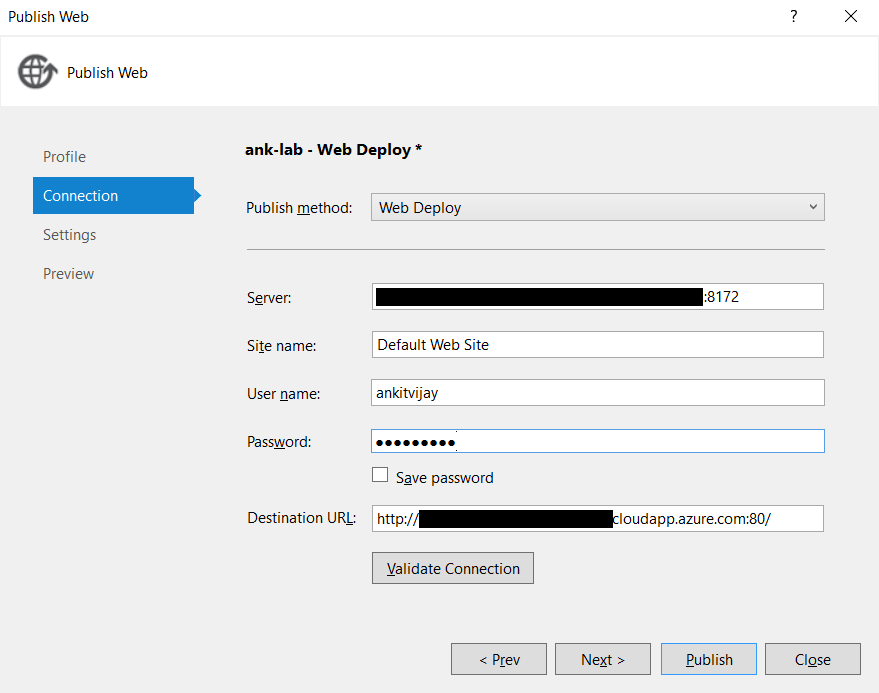
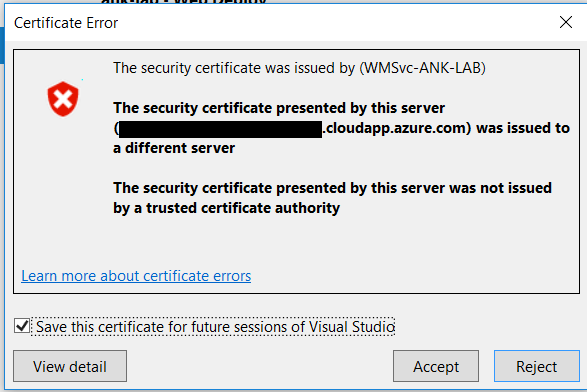
Now, click Validate Connection to validate your connection. You may get a Certificate Error. This error comes up because the remote server has a self-signed certificate for the Remote Agent Service or the Web Management Service. Click Accept to bypass certificate validation.
Click “Next” and then “Publish”. Once, the publish completes go to the publish URL to verify that the web app is up and running.

Leave a Reply