Setting up a website on classic Azure Virtual Machine is straight forward as in classic Azure VM we have the Endpoints for port 80 and 443 open by default. For each classic Azure VM we also had cloud service created. Hence, if we host a website directly on port 80 or 443 it would work without much hassle.
Recently, I landed up in an issue where I created a new Windows Virtual Machine with deployment mode as “Resource Manager” and deployed my web app on Azure VM, but I did not find the corresponding cloud service for the virtual machine. Hence, I could not browse my application through internet since I didn’t have DNS. I then tried to access my application through public IP address of the Virtual Machine but again it didn’t work. After digging into various Virtual Machine options in new Azure Portal I found out the issue. The new Azure VMs do not have port 80 or 443 opened by default. Additionally, they do not have DNS configured by default. To resolve the issue you need to follow below two steps.
Open http port 80/ 443
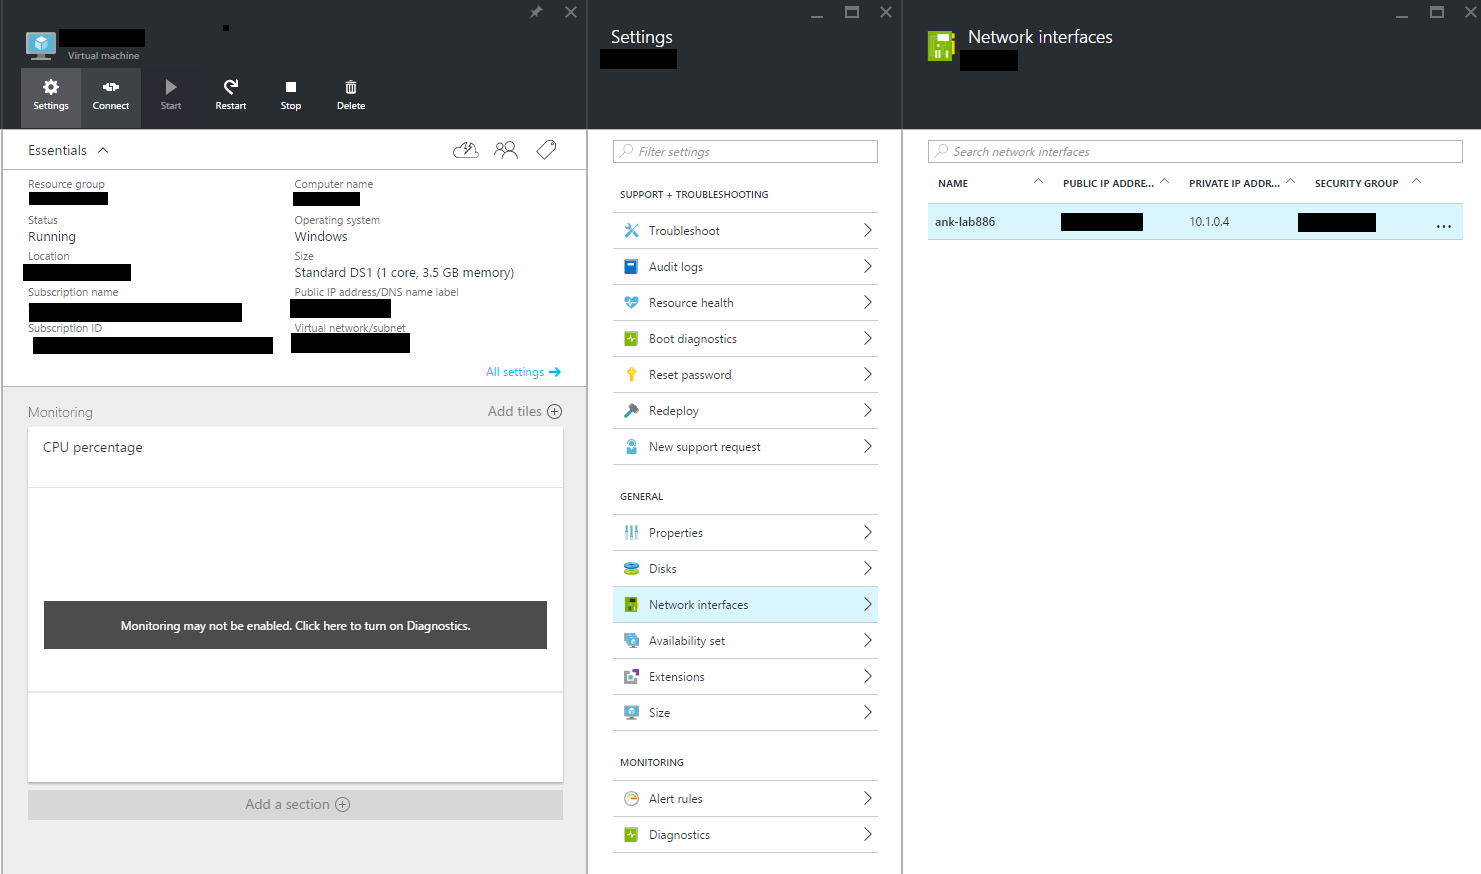
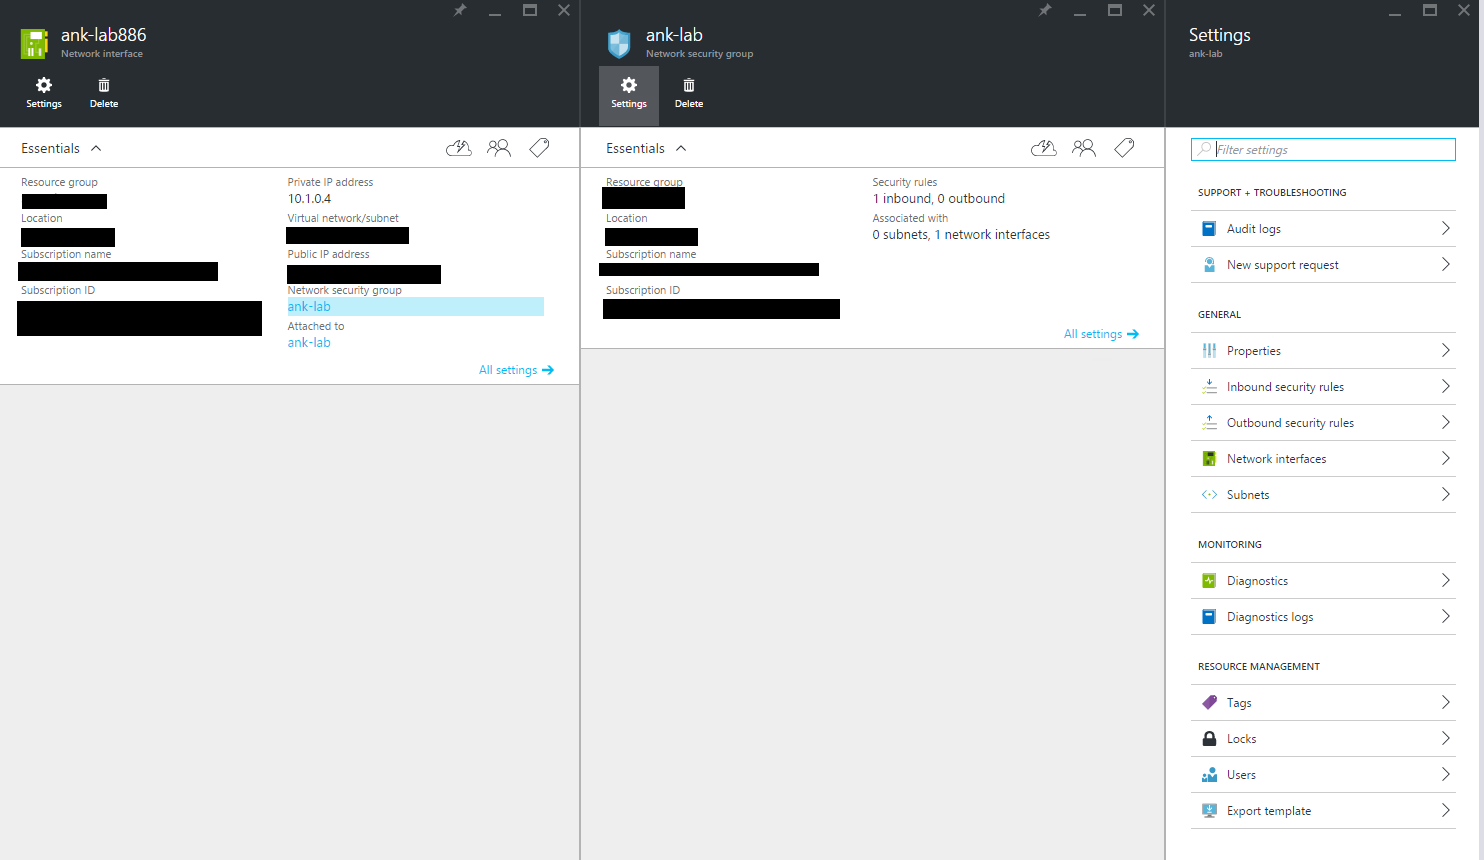
The open port option in new Azure VM is a bit obscure. You need to go Virtual Machine -> Settings -> Network Interfaces -> Select Network Interface -> Network Security Group -> Settings -> Inbound security rules as explain in the below two figures.
Now, click on Inbound security rules and add a new inbound security rule to open port 80 as shown in figure below.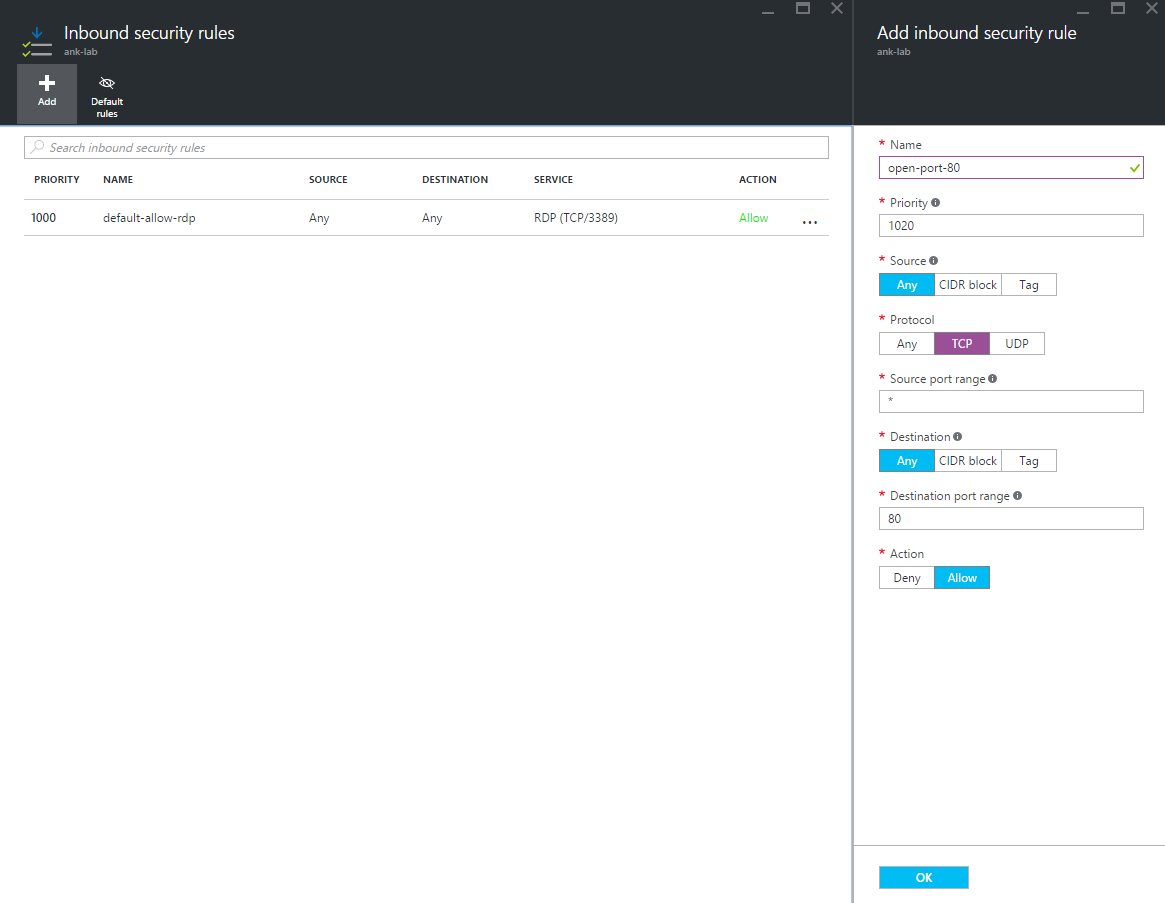
Similarly, open port 443 or any other port where your application is hosted. With this you can now access your application via public port number.
But you still cannot access your application through DNS. For that you need to first configure DNS name.
Configure DNS Name
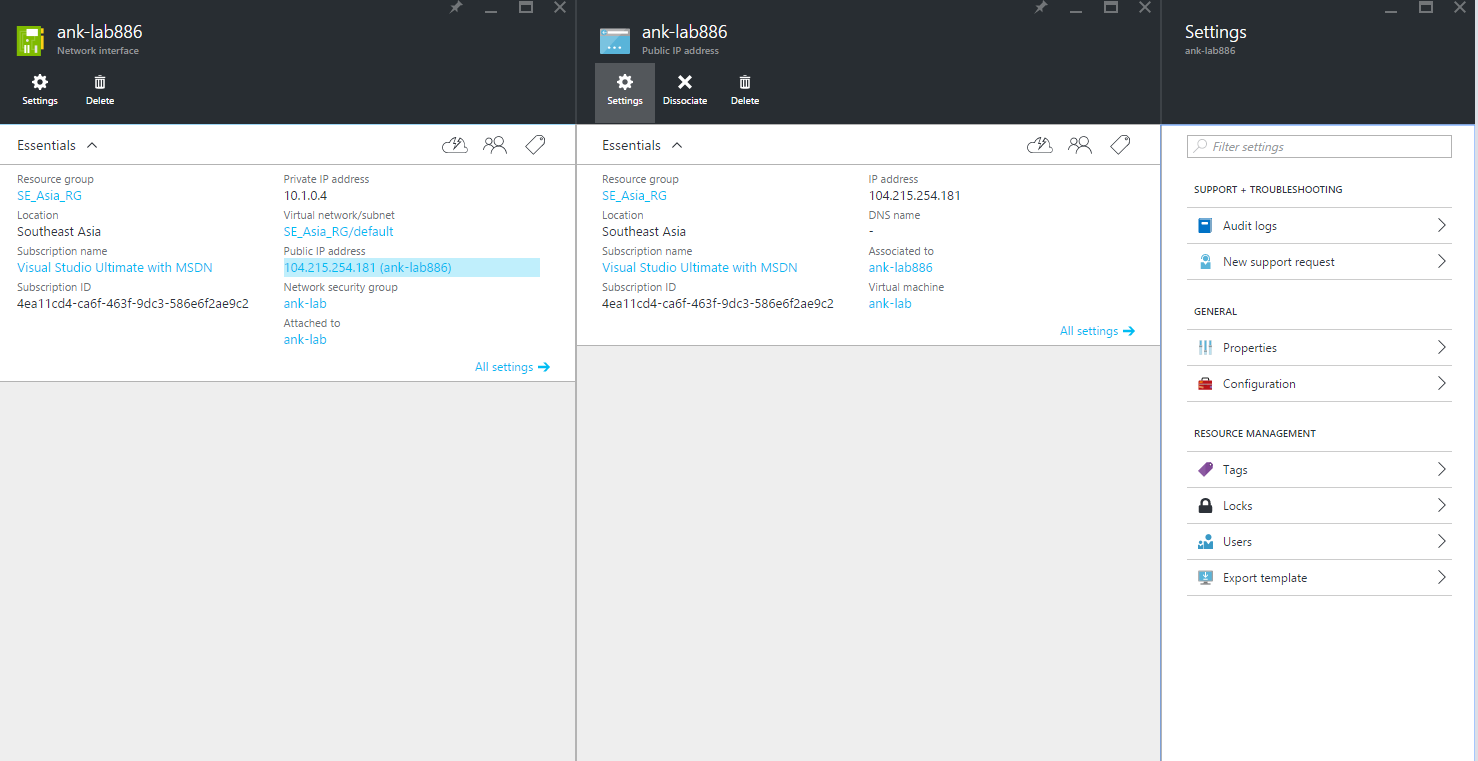
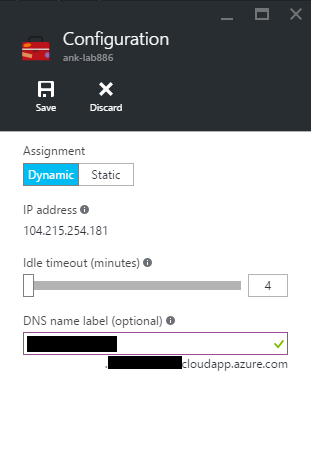
To configure DNS name you need to go to first go Network Interface as explained in the previous step. Now, Select Public IP address -> Settings -> Configuration as shown in figure below:
Now, just provide preferred DNS name and you are free to access, test, share your web app.
Hope this post helps someone to save time.

Leave a Reply